If you’re a WordPress website owner or administrator, you might have heard about the Heartbeat API. The Heartbeat API is a feature introduced in WordPress 3.6 that allows real-time communication between your browser and the server.
While this API serves some useful purposes, it can also put a strain on your server resources, leading to increased server load and potential performance issues, especially on shared hosting environments.
Let’s explore different methods to disable or control the WordPress Heartbeat API to optimize your website’s performance.
Reasons to Disable or Limit the WordPress Heartbeat API
While the Heartbeat API can be beneficial in certain scenarios, there are several reasons why you might consider disabling or limiting it:
- Reduced Server Load: If your website experiences a significant amount of traffic or is hosted on a shared server, the frequent requests from the Heartbeat API can increase server load, affecting your site’s performance.
- Resource Usage: The Heartbeat API consumes server resources, particularly if you have multiple users accessing the admin dashboard simultaneously. This can lead to higher CPU and memory consumption, impacting your site’s responsiveness.
- Plugin Conflicts: In some cases, the Heartbeat API can interfere with other plugins that rely heavily on server resources. Disabling or limiting the Heartbeat API might resolve such conflicts.
- Security Concerns: While the Heartbeat API itself is not a security threat, reducing the number of server requests can minimize the attack surface for potential DDoS attacks or brute-force attempts.
How to Disable or Limit the WordPress Heartbeat API?
There are several approaches to disabling or controlling the WordPress Heartbeat API. Let’s explore the most common methods:
1. Heartbeat Solution by Plugin
The easiest way to manage the Heartbeat API is by using a WordPress plugin. A simple plugin can help you control the Heartbeat API without any coding knowledge.
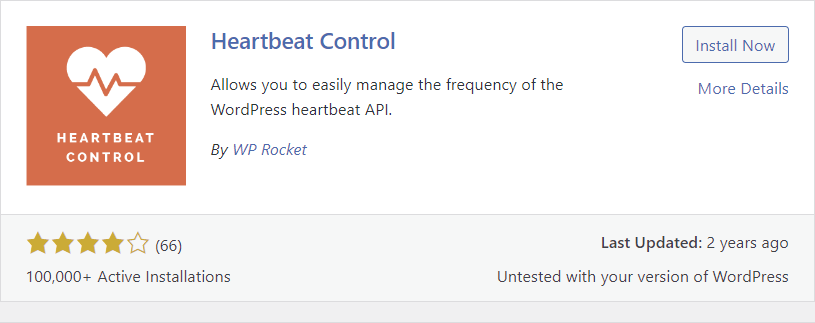
- Heartbeat Control by WP Rocket: This plugin allows you to easily control the frequency of the Heartbeat API or completely disable it on specific pages.
To install the plugin, search for “Heartbeat Control” in the WordPress plugin repository from your dashboard. You may also learn how to install a plugin in a right way 👉 here
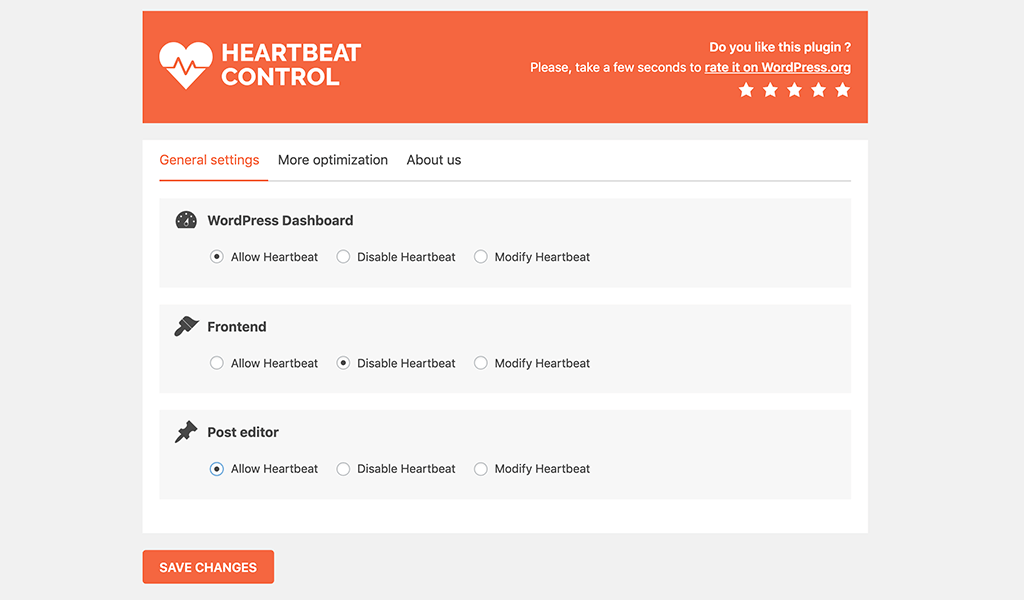
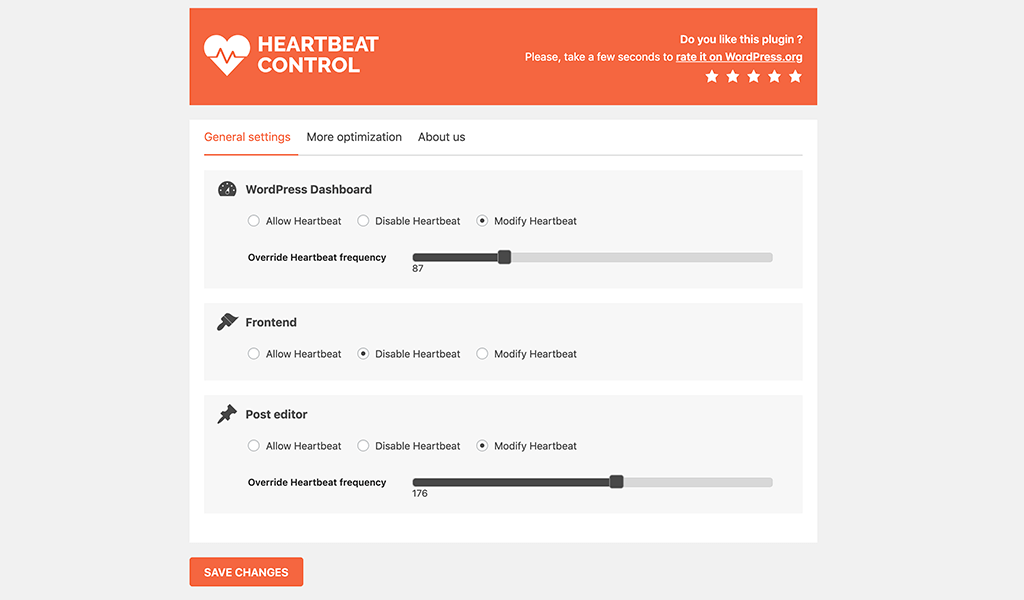
On the “Heartbeat control” page, you’ll find three heartbeat types and three options for each:
- WordPress Dashboard: This heartbeat type is responsible for providing dynamic updates and notifications for various features, such as showing the number of comments, displaying update notifications for plugins and themes, and more.
- Frontend: Plugins and themes may utilize the Heartbeat API on the frontend of your website to provide real-time updates or interactive features, such as updating cart items in WooCommerce.
- Post Editor: When you are editing a post or page in the WordPress admin, the Heartbeat API periodically saves your progress as you work, reducing the risk of losing changes in case of accidental browser closures or disruptions.

By default, the Heartbeat API sends POST requests to the server every 15 seconds on the dashboard.
On the Heartbeat Control plugin by WP Rocket, you’ll find three options to control the Heartbeat API:
- Do not modify heartbeat behavior: This option keeps the default WordPress behavior, where the Heartbeat API is active.
- Disable Heartbeat: Selecting this option will completely disable the Heartbeat API on your website.
- Control heartbeat frequency: With this option, you can reduce the frequency of Heartbeat API requests. You can choose from three predefined intervals: 15 seconds, 30 seconds, and 60 seconds.

After selecting your preferred Heartbeat control option, click the “save changes” button at the bottom of the page to apply the settings.
WP Rocket Plugin
2. Disable Heartbeat using PHP Snippet
If you prefer a more hands-on approach and have some coding knowledge, you can disable or control the Heartbeat API by adding code snippets to your theme’s functions.php file or a custom plugin.
To disable the Heartbeat API entirely, add the following code to your theme’s functions.php file:
/**
* @snippet Disable heartbeat in WordPress
* @source https://www.wptechnic.com/?p=11547
* @compatible WP 6.2.2
*/
add_action( 'init', 'disable_heartbeat', 1 );
function disable_heartbeat() {
  wp_deregister_script('heartbeat');
}
If you want to control the Heartbeat API and adjust the frequency, you can use the following code:
/**
* @snippet Control heartbeat in WordPress
* @source https://www.wptechnic.com/?p=11547
* @compatible WP 6.2.2
*/
add_filter( 'heartbeat_settings', 'custom_heartbeat_frequency' );
function custom_heartbeat_frequency( $settings ) {
  $settings['interval'] = 60; // Change the value (in seconds) to your desired frequency.
  return $settings;
}
Remember to create a child theme before making any changes to the functions.php file to avoid losing customizations during theme updates.
Conclusion
The WordPress Heartbeat API can be a useful feature for certain real-time functionalities, but it may not be necessary for every website.
If you find that the Heartbeat API is causing performance issues or increasing server load, disabling or limiting it can help optimize your website’s performance and improve user experience.


1 Comment
This a better filter to disable heartbeat, disabling the script doesn’t stop wordpress calling it (correcting typos)
add_filter( ‘heartbeat_settings’, ‘disable_heartbeat’ );
function disable_heartbeat( $settings ) {
$settings[‘disabled’] = true; // Disable Heartbeat
return $settings;
}