WordPress is a powerful platform for creating websites, but sometimes it can run into performance issues. One common issue that can occur is reaching the maximum execution time limit.
This can cause your website to display a fatal error, such as “maximum execution time exceeded”.
This error is caused by a limit set on the maximum amount of time a script is allowed to run by your web host’s server. When this limit is exceeded, the script is terminated, resulting in an error message.
To avoid this issue, you can increase max_execution_time limit in WordPress.
What is the Maximum Execution Time?
Maximum execution time is a setting that limits the amount of time a script is allowed to run. The default value for maximum execution time in most web servers is 30 seconds.
This is usually enough time for a script to complete its tasks, but if you have a large website with many plugins, or if you are using a slow hosting provider, you may need to increase the maximum execution time limit.
Why Increase WordPress Maximum Execution Time?
Increasing the maximum execution time limit can help prevent your website from displaying an error. It can also help improve the performance of your website, especially if you are running complex scripts or if you have a large number of plugins.
3 Ways to Increase WordPress Max Execution Time
There are several ways to increase the maximum execution time limit in WordPress. Here are three common methods:
Using the .htaccess File
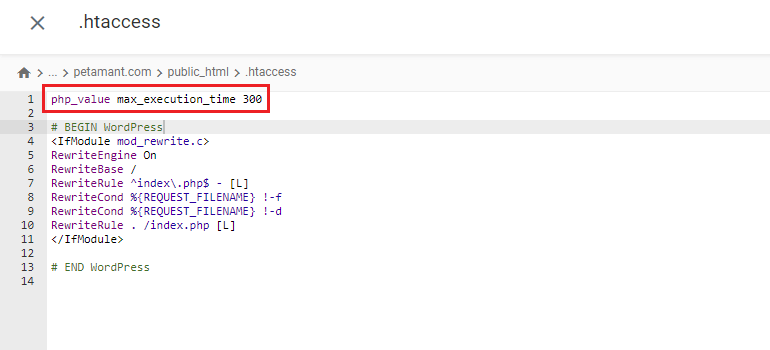
The .htaccess file is a configuration file for Apache web servers. You can use it to increase the maximum execution time limit for your website. To do this, you need to access the .htaccess file in your website’s root directory.
- Navigate to the root directory of your website using File Manager or FTP client.
- Locate the .htaccess file, or create one if it doesn’t exist.
- Add the following code to the .htaccess file:
php_value max_execution_time 300
Save the file and exit the editor. Now test your website to see if the error has been resolved.
Using the php.ini File
The PHP.INI file is a configuration file used by PHP to set various parameters for executing PHP scripts. This method is the recommended approach for increasing maximum execution time for WordPress.
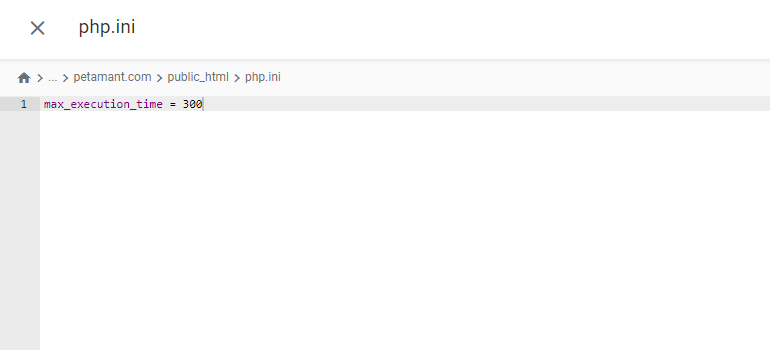
if you have access to this file, you can use it to increase the maximum execution time limit. To do this, you need to access the php.ini file in your website’s root directory.
- Log in to your hosting account control panel and navigate to the File Manager or FTP client to access the root directory of your website.
- Search for the php.ini file in the root directory of your website, or create one if it doesn’t exist.
- Add the following code to the php.ini file:
max_execution_time = 300
Save the file and exit the editor. Now test your website to see if the error has been resolved.
Using the Functions.php File
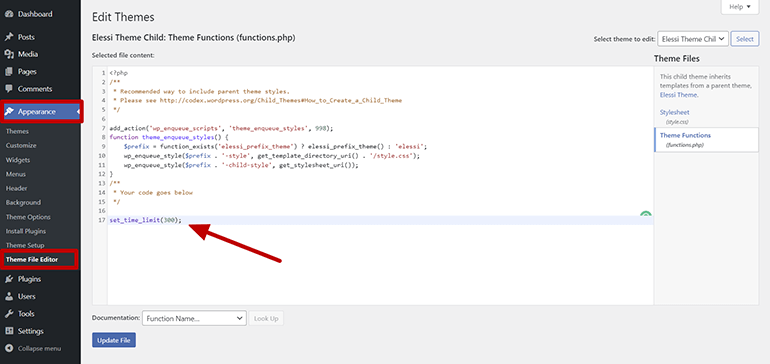
If you don’t have access to the .htaccess or php.ini files, you can still increase the maximum execution time limit in WordPress by adding some code to your functions.php file. To do this, you need to access the functions.php file in your website’s theme directory.
Once you have access to the functions.php file, add the following code:
set_time_limit(300);
This will increase the maximum execution time limit to 300 seconds. You can adjust the value to any number you want, but be careful not to set it too high.
Using the wpconfig.php File
You can also increase WordPress maximum execution time using wp-config.php file.
The wp-config.php file is a configuration file used by WordPress to set various parameters for the WordPress platform.
- Navigate to the root directory of your website using File Manager or FTP client.
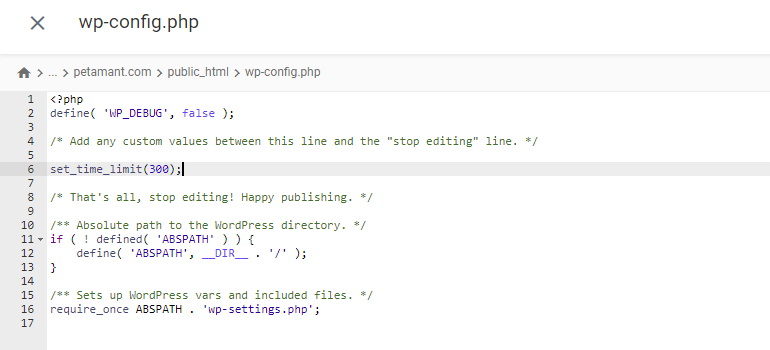
- Locate the wp-config.php file, and open it using a text editor.
- Add the following code to the file, just before the line that reads “That’s all, stop editing! Happy blogging.”
set_time_limit(300);
Save the file and exit the editor. Now test your website to see if the error has been resolved.
The above code sets the maximum execution time to 300 seconds (5 minutes). You can increase or decrease this time as needed.
Conclusion
Increasing the maximum execution time for WordPress is a straightforward process that can help resolve the “maximum execution time exceeded” or max_execution_time error.
You can use any of the methods described above to increase the maximum execution time for your website. However, the PHP.INI method is the recommended approach, as it’s the most reliable and allows you to configure other PHP settings as well.
To avoid this kind of issue, get a better WordPress hosting today.

![How to Increase and Fix WordPress Max Execution Time Error [4 Easy Ways] wordpress max execution time fatal error](https://www.wptechnic.com/wp-content/uploads/2023/02/wordpress-max-execution-time-fatal-error.jpg)