After Installing WordPress for your website or blog, now it’s time to learn how to add a new post in WordPress.
While some of you may already know how to add a new post in WordPress and think it is very easy to do, so many beginners still find the new block editor interface a bit complex.
In this tutorial, I’ll show you step by step guide on adding a new post in your WordPress website utilizing the new block editor features in a better way.
Learn How to Add a New Post in WordPress using The Default Block Editor
With its default and modern “Block-Editor”, also known as Gutenberg, you can add a new post in WordPress and customize all the way you want utilizing its many powerful features.
I will explain some of the required and/or common features of the WordPress post editor screen that will help you to create a new post in your WordPress blog or website.
First, you need to login to your WordPress admin area following the link www.mydomain.com/wp-admin (change ‘mydomain’ with your actual domain name).
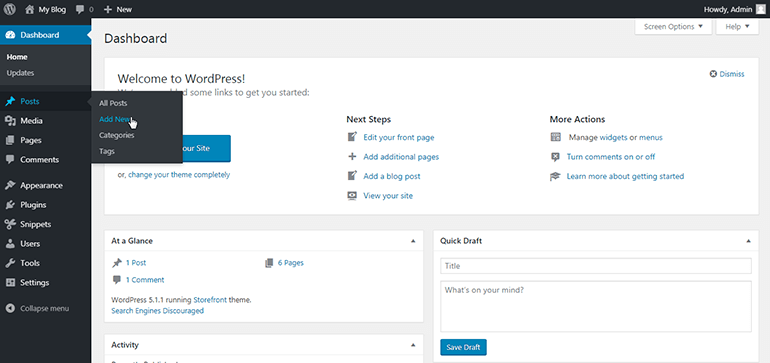
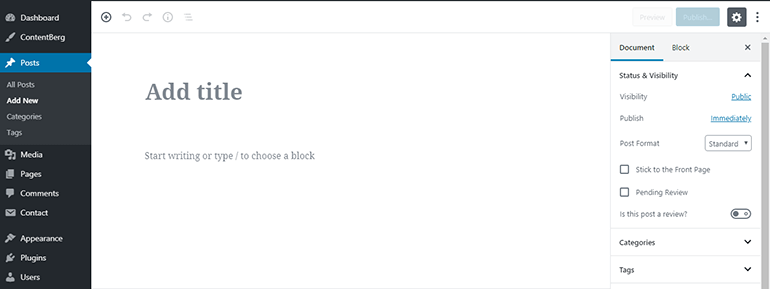
Now from your admin dashboard, hover your mouse to “Posts” on the left sidebar and select ‘Add New’ from the dropdown menu and you will land on the WordPress post editor page.
Click on “Add New” Post
Adding Post Title
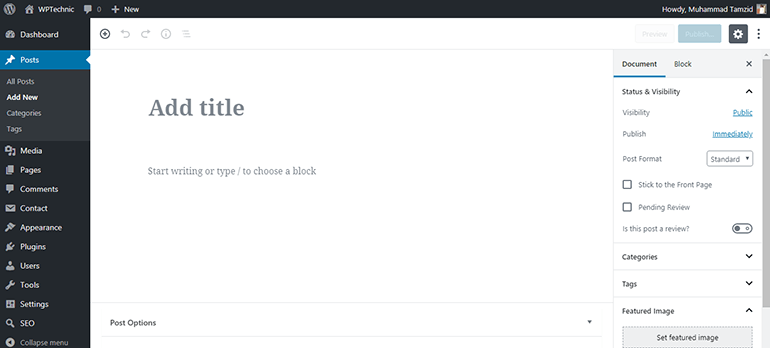
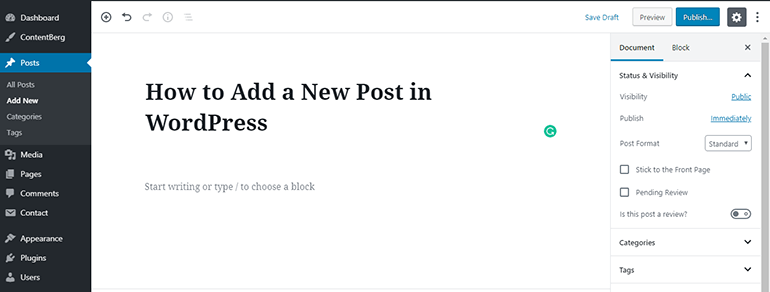
You can enter your post Title in this field. The post title is usually shown above the content with an H1 heading tag.
For example, the title of this tutorial is “How to Create a WordPress Post – Step by Step Beginners Guide”.
Adding Content Using Blocks
Other than your post Title, everything a user can see on your post is ‘Content’ of your post that may include texts, images, videos, and others.
You can add your content by start writing or adding a block on the content area. WordPress’s new block editor features allow you to customize and design your contents all the way you want to attract your visitors.
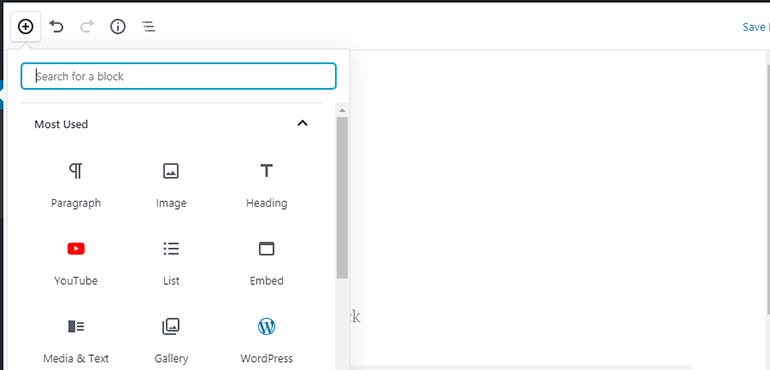
All of your post contents will have a separate block. Some common blocks are Paragraph, Heading, Image, List, Gallery, Quote, Audio, Code and Media & Texts.
Your theme and other plugins may add additional blocks for your post editor. You can also use the search option to search for a block.

To make your writing process more easy, WordPress also allows you to add new block using a keyboard shortcode. Simply add / (slash or forward slash key) to search and add new block.
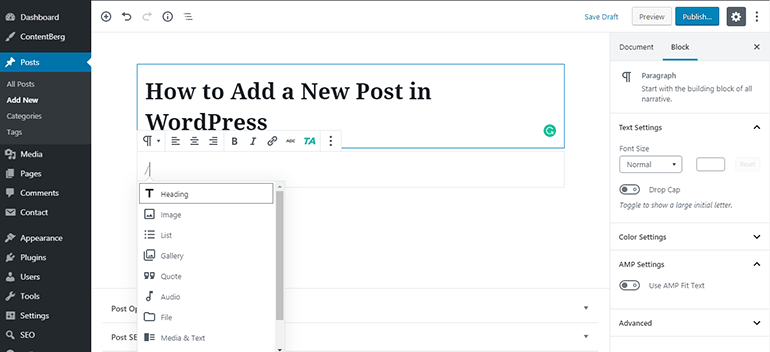
With WordPress’s new block editor, you can add the actual content of your post and see how it will be shown to the users.
Adding Images, Videos, & Other Media
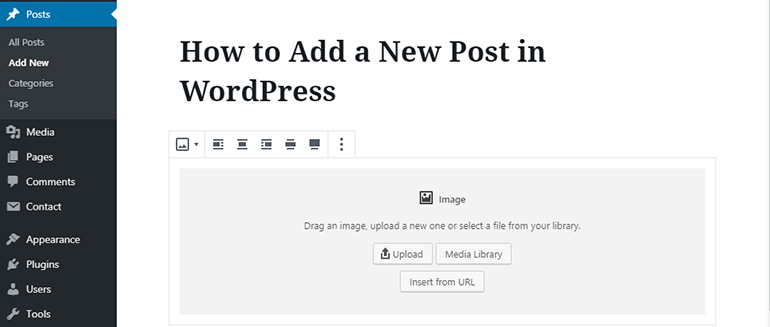
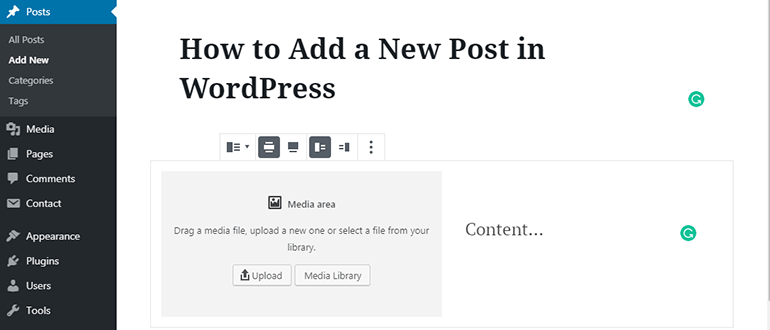
You can add images, videos, and other types of media by adding a new image or media block. Then click on ‘Upload’ to upload your new media or select the file from ‘Media Libary’ option.
Using the ‘Media & Text’ block in your WordPress editor you can design your content by displaying an image on the left or right side and texts on the other side.
The default WordPress block editor also comes with features of embedding any media, link, or file from other popular platforms.
Using Embeds block you can embed posts from Twitter, Facebook, or Instagram, videos from YouTube or Vimeo, any WordPress posts or pages from your own blog, music from SoundCloud or Spotify, and many more.
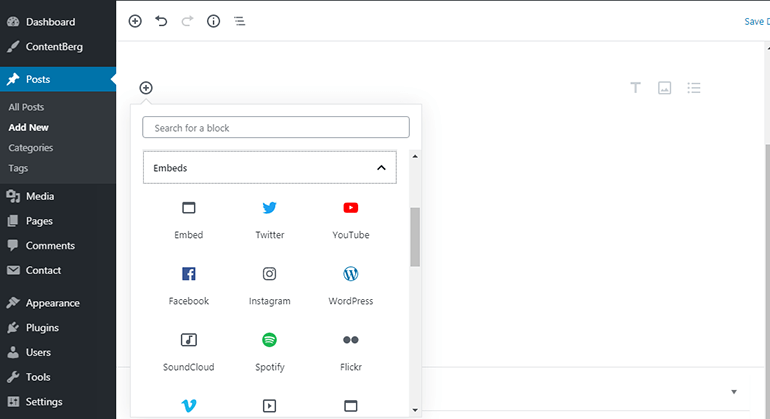
You can also just copy and paste a link from any supported platform into your post editor and WordPress will automatically embed that for you. Try adding a new video just doing copy and paste the link your block editor and let me know the result.
Status & Visibility
Once you are done with the ‘Visible Content’ for your post, now its time to work on Document settings for this post. And the first of the document settings is Status & Visibility option.
Visibility: By default, your post is set to Public and anyone can see the post after you publish it. You can change the visibility from Public to Private or Password Protected.
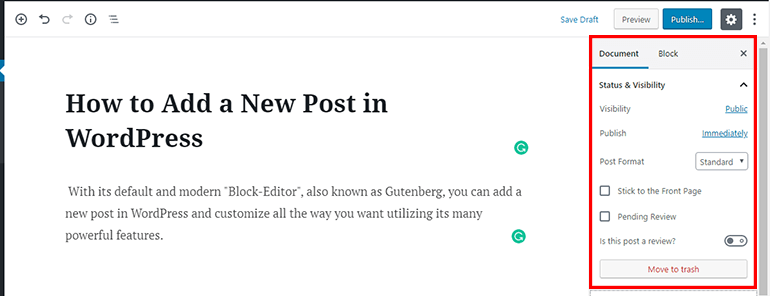
Click on the ‘Public’ option to change this setting.
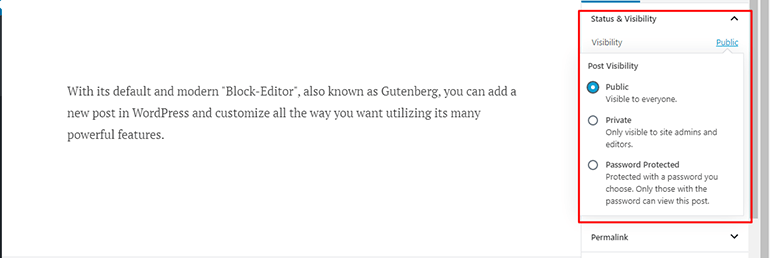
Public posts are visible to everyone who visits your website, Private posts are only visible to admins and editors of your WordPress site, and visitors can only view your PassWord Protected posts with a password you choose.
Publish: Your post gets published immediately after you click on the publish button. Before that, it is saved as Draft and only Admin (or other users with proper access) can see the post in the admin panel.
However, you can publish your post in a previous date or set is as schedule post to be published on a future date in a specific time. Click on ‘Immediately’ option to change this setting.
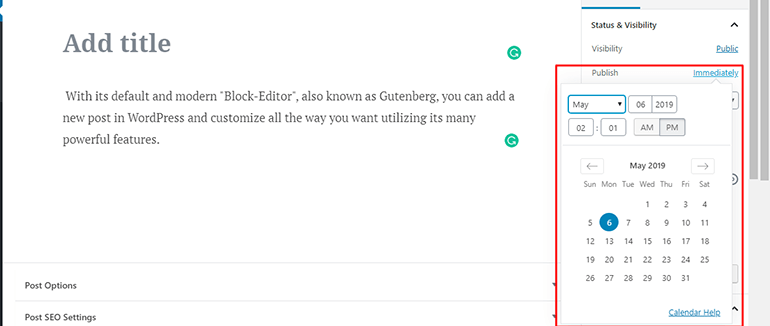
Here, you can select any day from the previous time to publish your post for that day or select a day from future to make your post ‘scheduled’ and to be published on your specific time. Click on calendar help to know how to use this calendar.
Post Format (Optional): Your theme may come with this option allowing you to set a format for your post type. Select the Standard for your post. You can also select the specific type of formats for Gallery, Image, Video, or Audio posts.

Creating a Permalink
Permalink is the actual URL to your WordPress post. WordPress automatically creates a permalink from your Title.

You can also change it to anything you wish. However, a short permalink is easy to remember. For example, the permalink of this post is https://www.wptechnic.com/how-to-add-a-new-post-in-wordpress/
Adding Categories and Tags
When adding a new post in WordPress, you can also sort your post by adding categories and tags. These taxonomies are used to organize your blog posts or articles into different sections or topics.
By using categories and tags you can show similar contents of the same topic under its archive page. They are useful for SEO purpose.
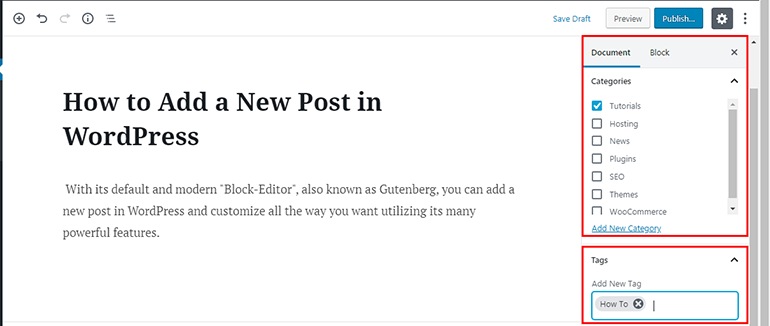
Categories: On the right-hand side you’ll get the option to select or add a new category(s) for your post. If you have already added category(s) for your website, you can select one or more category from here and assign that to your post.
To create a new one, simply click on ‘Add New Category’ option, enter the name of your category, select parent category if necessary, and hit ‘Add New Category’ button to save.
Tags: You can also add necessary tags for your post. Start typing in “Add New Tag” box. If the tag is added before you will see a selection option or you can simply add a new one. You can use ‘comma’ as a separator to add multiple new tags.
Adding a Featured Image
Featured image works as the post thumbnail (display image) for your post. Depending on your theme, you can add a graphical image or a video as your featured image.
You can set a featured image for your post under document settings.

Adding Excerpts (Summary)
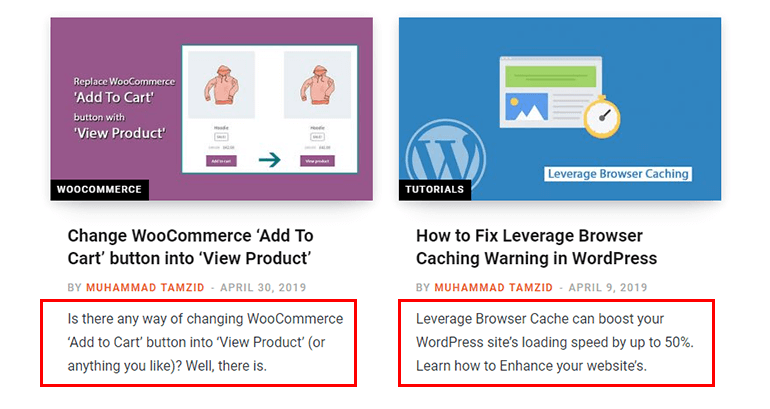
An excerpt is usually the summary of your blog post or article. It can also be used to add some catching lines to attract your readers to read the full post.

Excerpt is usually shown under your blog post in home page or any other archive page under your post title or featured image.
Turn Comments On / Off
The comment is a default built-in discussion system in WordPress. By default (Settings>Discussion) comments are allowed for all post types.
You can disable comment system for individual post from Discussion tab in Document settings.
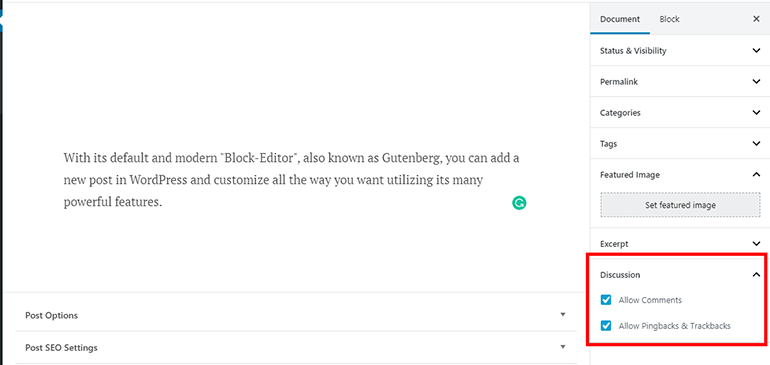
You will also see another option to turn off Pingback & Trackbacks. If you enable this option and other website mentions your post on their website, your post will give a pingback to that website linking their post in your post.
However, spammers mostly use this feature to get backlinks to their site. Therefore, we recommend you disable this option for your blog posts.
Publishing Your Posts
Once you finish adding content and selecting categories and tags, and adding a featured image of your post, now you need to click on ‘Publish’ button to create a new WordPress post for your website.
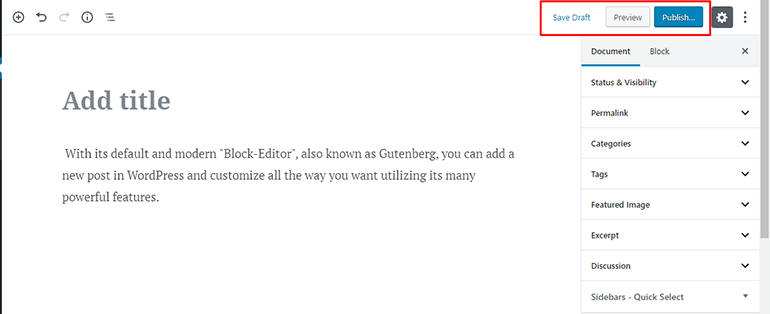
If you are not ready to publish your post yet, you can click on ‘Save Draft’ to quickly save your changes to your post. However, WordPress by default keep saving your changes as you write.
By clicking on ‘Preview’ button, opens in a new tab, you can see your post as a live preview as exactly what your readers will see. If you are happy with the content, you can now publish your post.
That’s it. You have successfully created a new post on your WordPress site. You can now go to your home page or category archive page to check out the newly created blog post.
You’ll also see your published post added in your selected category(s) and tag(s) archive pages.
Post Edit Screen Options
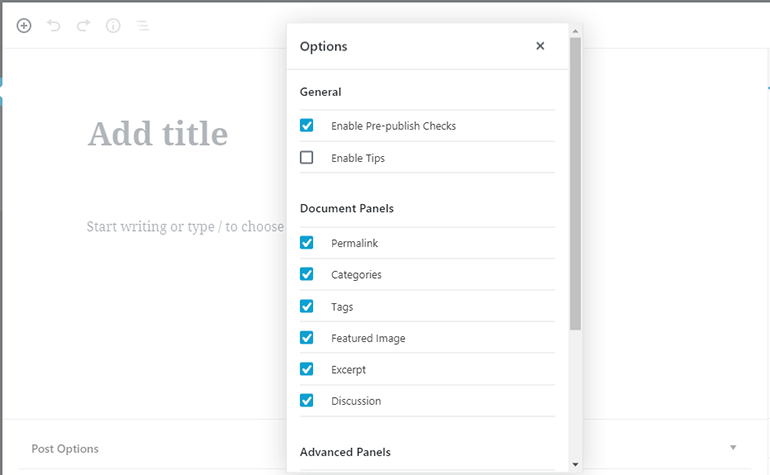
WordPress allows you to show or hide any tools from your post editor screen. To do that, you need to click on ‘Show more tools & option’ menu from the top-right corner (three-dot) of your screen and then click on ‘Options’ from the dropdown menu.
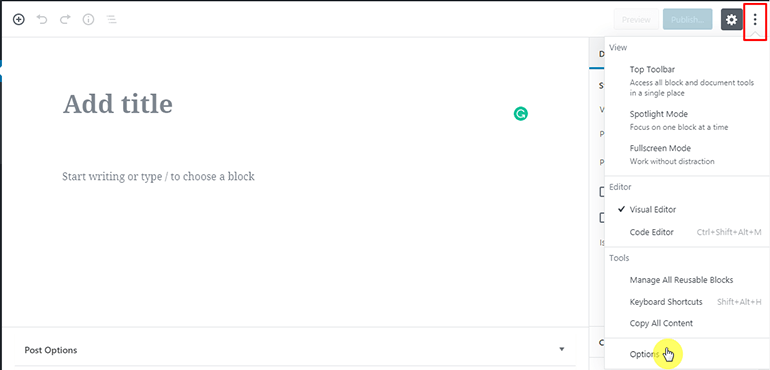
A new popup will appear where you can check or uncheck the boxes to show or hide any tool.
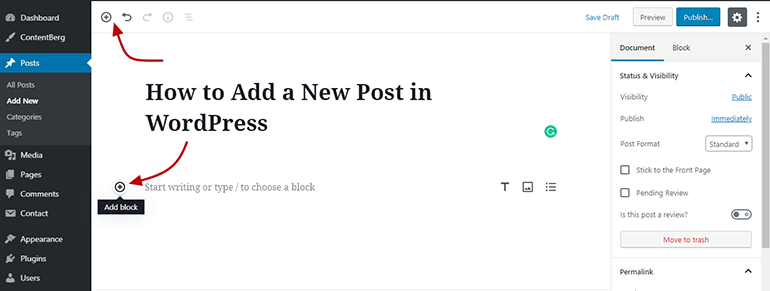
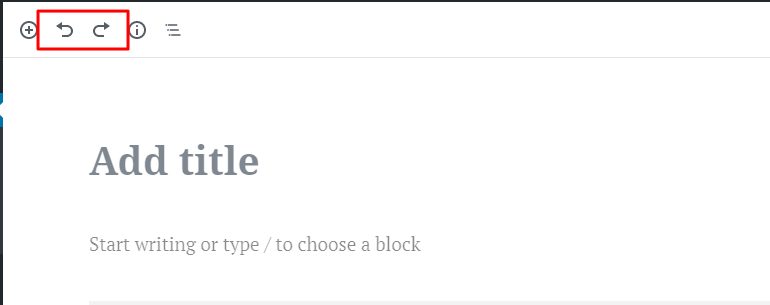
On the top-left corner of the screen, you will see some additional buttons. The first one. from the left side, is adding a new block to your post. Click on that button to quickly insert new contents in your post.
Next to that, you have ‘Undo’ and ‘Re-do’ buttons which allow you to undo or redo your changes to your posts before saving or publishing them. You can also perform Undo & Redo action using keyboard commands Ctrl+Z & Ctrl+Shift+Z.
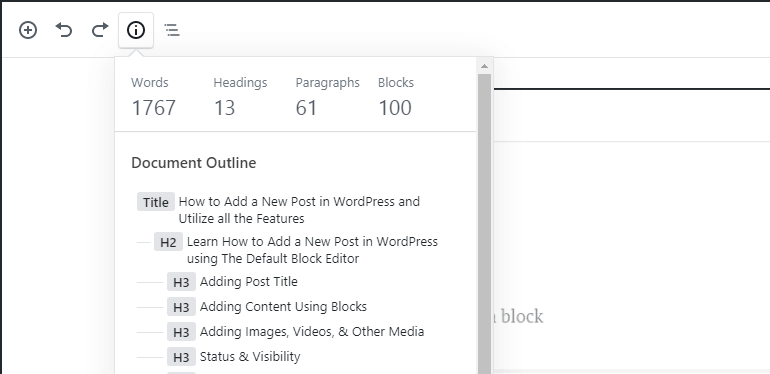
Next you will see the information icon. Click on that and it will show you detail information about your post like the number of WordPres, Headings, Paragraphs and Blocks it contins and Document Outline.
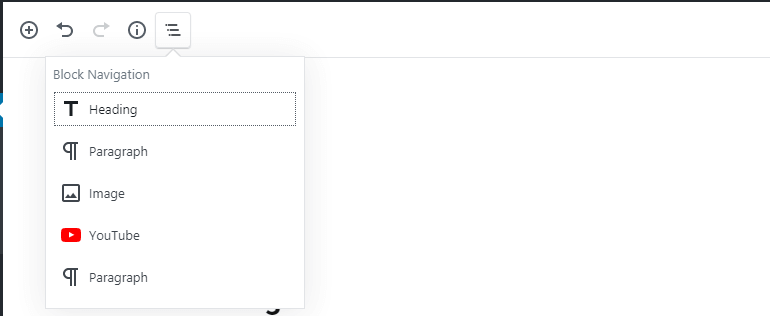
The last button in the top-left corner is the ‘Block Navigation’ button. This option allows you to quickly jump to a block in your post.
Finally, we can say that the default WordPress post editor is pretty impressive and handful. I suggest you explore all the features on your own and see the differences in your post in real-time. That way, you can learn better.
Creating a New Post in WordPress – Classic Editor
The above screenshots are taken from WordPress default “Block Editor” screen. If you are using “Classic Post Editor”, you will see a different look of post editor screen like this one:
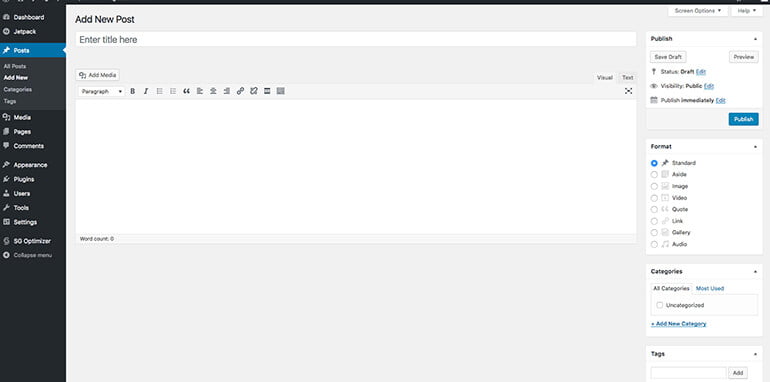
Default features for the post are almost the same for WordPress’s both block editor and classic editor, except the block features.
Since we’ve already covered all the WordPress post editor features from block editor, the below image will help you understand where are all those features in the classic editor.
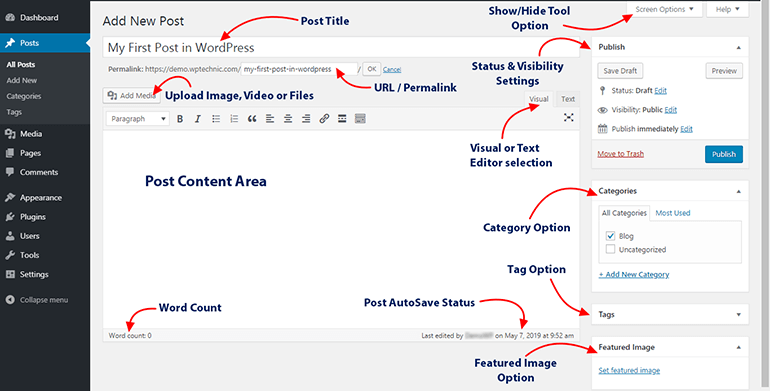
However, your theme and other active plugins may add additional features to your classic post editor screen like post format, post SEO, and more.
Now I’d like to hear from you…
I hope this guide helped you learn how to add a new post in WordPress website. If you liked this tutorial, feel free to share it on social media with your friends and fellows.
If I missed anything or if your theme shows different style/features on post editor screen that you don’t understand, either way let me know by leaving a comment below right now.

