Most WordPress hosting companies offer scripts like Softaculous to automate the installation process that you don’t even need to learn how to install WordPress manually.
However, if you need to install WordPress manually for any reason, it takes less than 10-minutes to make your website ‘live’.
One of the reasons why WordPress is a very popular CMS is because it’s simple and easy to Install.
In this tutorial, we will show you all the steps on how to install WordPress manually using FTP or in cPanel of your web hosting and make it run within minutes.
Learn How to Install WordPress Manually
To make it easy, we have published a video tutorial on how to install WordPress manually using an FTP client that you can watch below.
However, if you just want to follow text instructions, then keep reading our step-by-step tutorial on how to install WordPress manually using FTP or in cPanel.
We’ll go through 4 Easy Steps:
Step 1: Downloading WordPress files
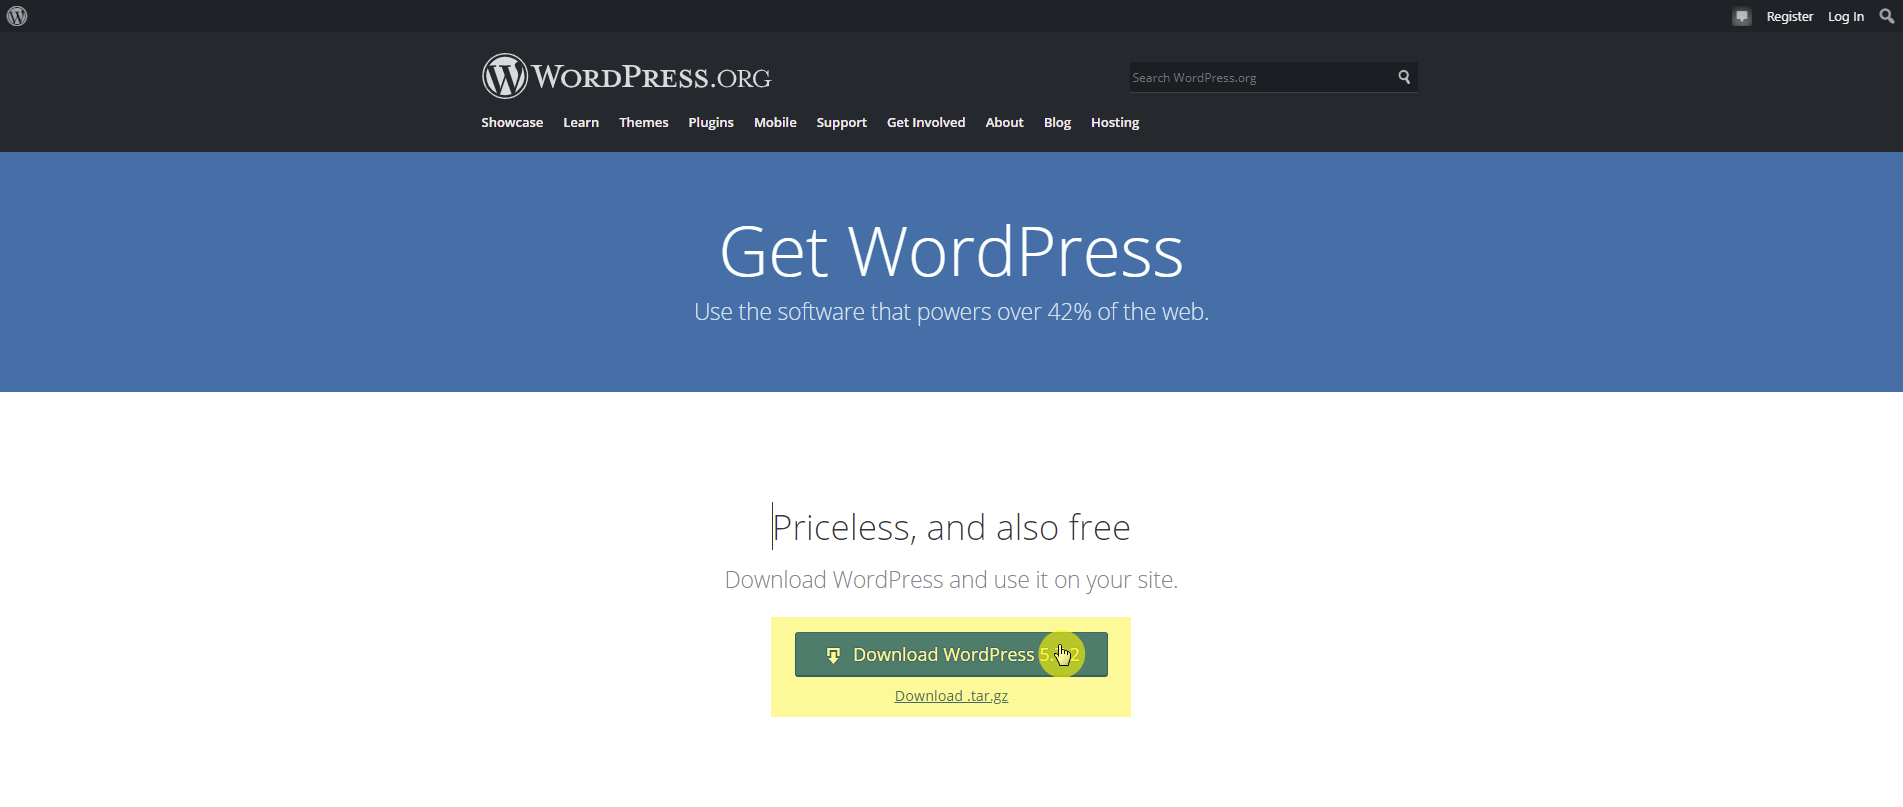
To start the installation process, you need to download WordPress from its official download page. We recommend that you always download the latest released version of WordPress from their official source only.
Click on the download button, marked as in the above screenshot, the installation package will be downloaded and saved to your computer.
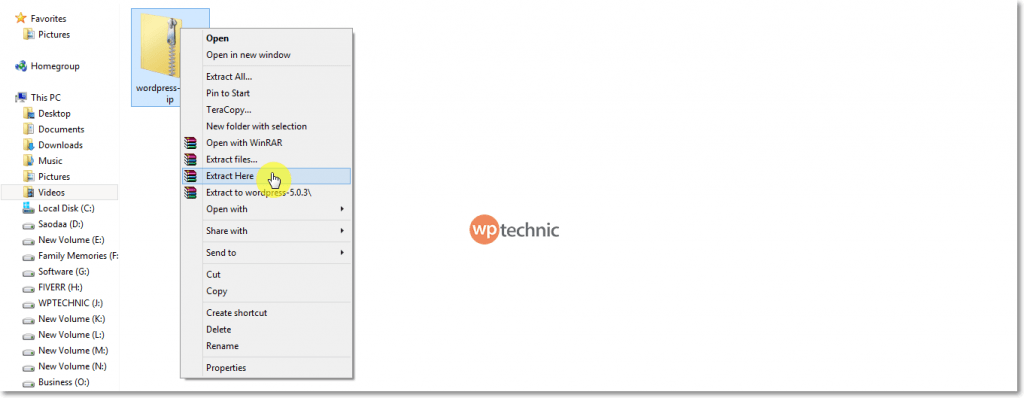
Now go to your download folder, click on the zip file that you’ve just downloaded and unzip (or extract) it to a new folder.
Step 2: Uploading WordPress Files to your Server
Now, you need to upload all the files of that WordPress folder to your web hosting using an FTP Client or directly in cPanel using File-manager.
Upload Files Using an FTP Client
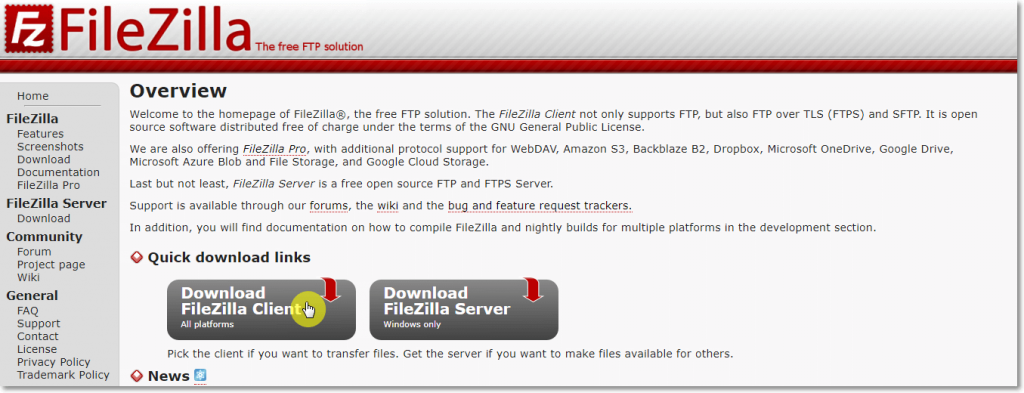
To upload WordPress files to your web server you can download and install any FTP client for your computer. If you are using a Windows PC, you can try installing FileZilla or if you are using a MAC, you can go for Cyberduck.
To use an FTP client and connect it with your web server, you need login credentials with proper access. If you do not have FTP credentials, then contact your hosting service provider.
Connect FTP client to your server
For better understanding, you can also read this tutorial to learn how to upload files to WordPress using an FTP client.
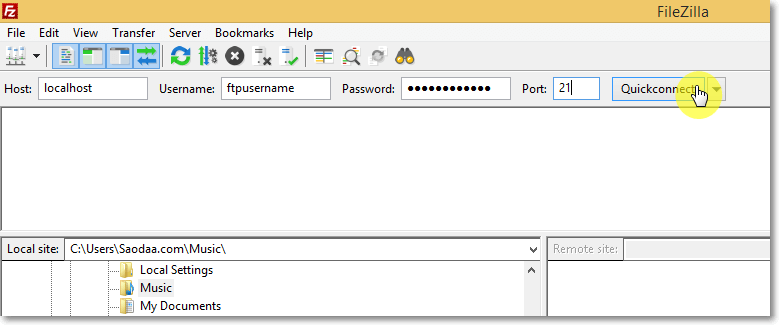
NOW, open the FTP client and enter your Host name, FTP username, FTP password, and Port to connect with your website. You can enter your domain name or its IP address in Host name field, and Port is 21.
However, this information may vary and you can get all the right information from your hosting provider.
If everything is good, click on ‘Quickconnect‘ button and you will be connected to your hosting.
You will see a list of files and folders on the right side of the FTP client window. Those are your hosting/server/web files.
Upload WordPress Files
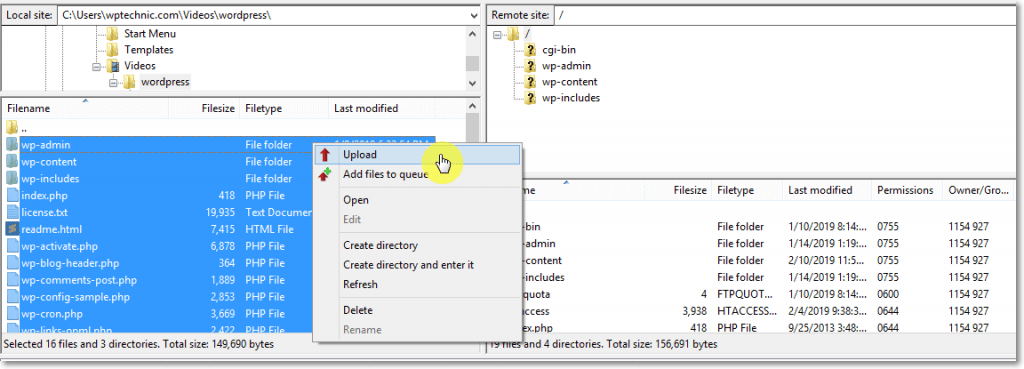
Now, on the ‘Remote site’ column, navigate to the path public_html folder to install WordPress on your root domain like yourdomain.com.
If you want to install WordPress on any subdomain or another directory then upload the files there.
Now, from your left-hand side, navigate to your download folder, click on the
Now you must wait until all files are uploaded to your web server. That’s it, you are done with the FTP part.
Upload Files in cPanel using FileManager
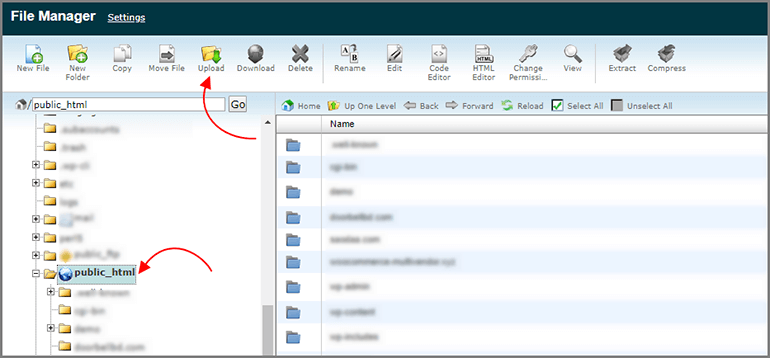
Login to your cPanel and click on the ‘File Manager’ option.
On the next screen, navigate to the path public_html folder to install WordPress on your root domain like yourdomain.com. If you want to install WordPress on any subdomain or another directory, select that folder.
Now click on ‘Upload’
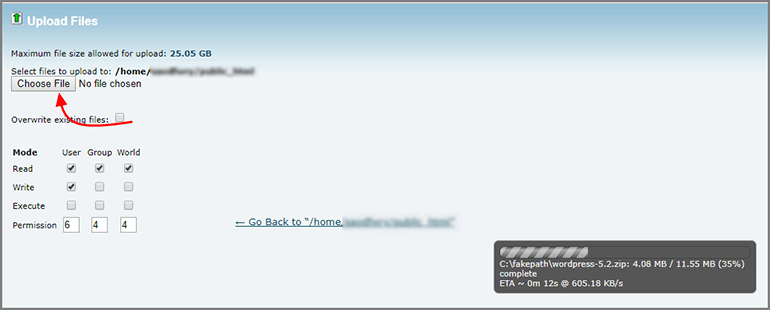
Now on the next screen, simply select your ‘WordPress ZIP file’ (not extracted one) to upload that to your chosen path.
Click on the ‘choose file’ button and select the file from your computer hard drive. Uploading will be started immediately.
Once completed, go back to your file manager and refresh the page. You’ll see that the WordPress zip file has been uploaded there.
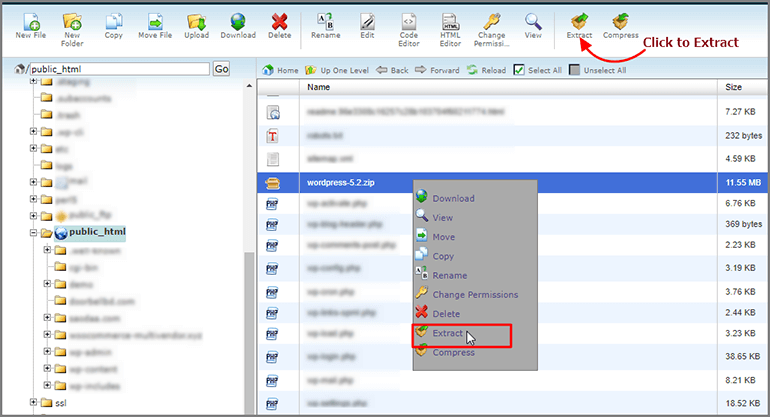
Now select that Zip file, right-click on it and select ‘Extract’. You can also click on the extract button from the top menu option.
That’s all. You’re done with uploading the files.
Step 3: Create a MySQL Database and a User
Now you need to create a MySQL database and a MySQL user and then assign the user to the database with full access.
Go to your hosting control panel or login to cPanel and search for the option/button to create a database. We are using SiteGround cPanel hosting, thus our screenshots will be of cPanel.
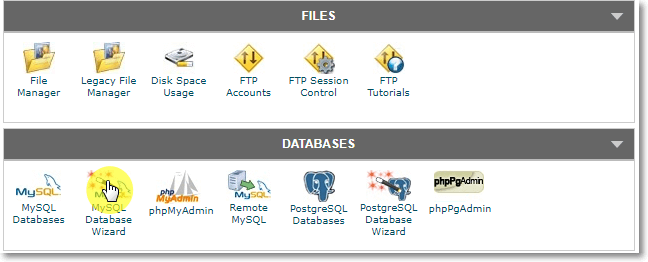
Click on ‘MySQL Database Wizard‘ from your cPanel.
On the next page, enter your database name to create the new one. By default, the database may include your ‘cPanel username‘ as a
Once ready, click the Next Step button.
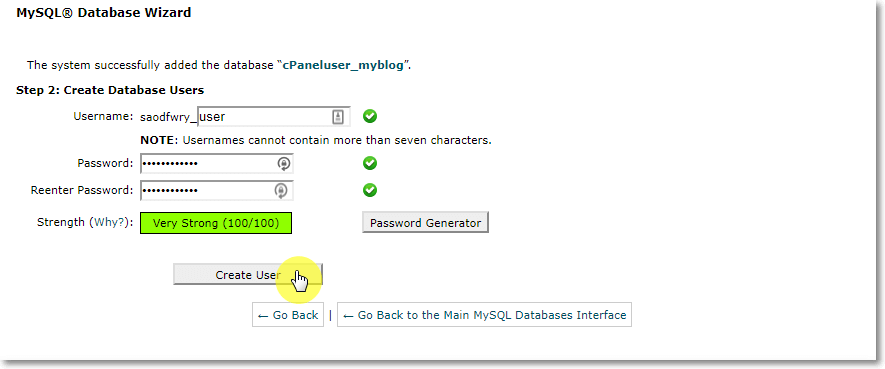
Now that you have created a database, you can create and assign a user to that database on this page.
Here, a username may also include your cPanel username as a prefix and you shall provide a unique name to it.
Then you can provide a strong password or use the ‘Password Generator‘ button to generate a unique password for your database user.
Click on
Make sure you note down the database name, username, and password that you’ve just created. You will need those for the installation process later.
That’s it! On the next page, you will see a confirmation message telling you of the successful completion of the operations.
Step 4: Begin the installation process
Now it’s time to run the installation process. If you have uploaded WordPress files in your public_html directory then enter your domain name in the web browser like example.com or www.example.com.
Please note: If your main domain doesn’t redirect you to the installation page, you may try typing yourdomain.com/wp-admin/install.php
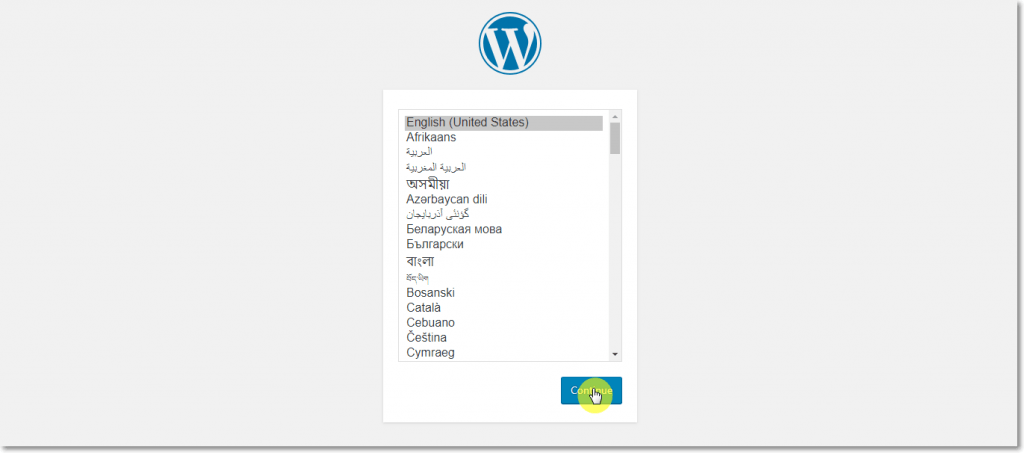
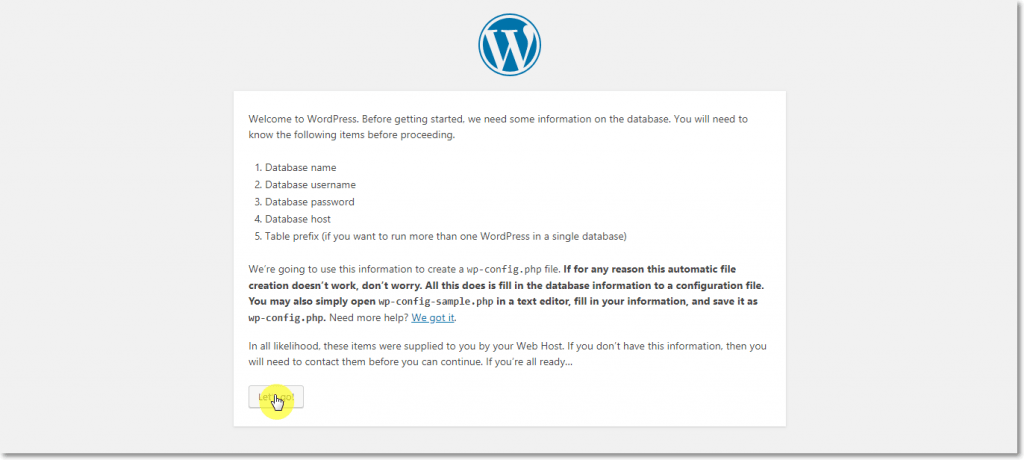
1. In this window, select the language for your website. Don’t worry, you can change it later, anytime you wish. Click Continue.
2. On the next page, WordPress will tell you to prepare the necessary info to connect WordPress with your database.
You have saved them from the
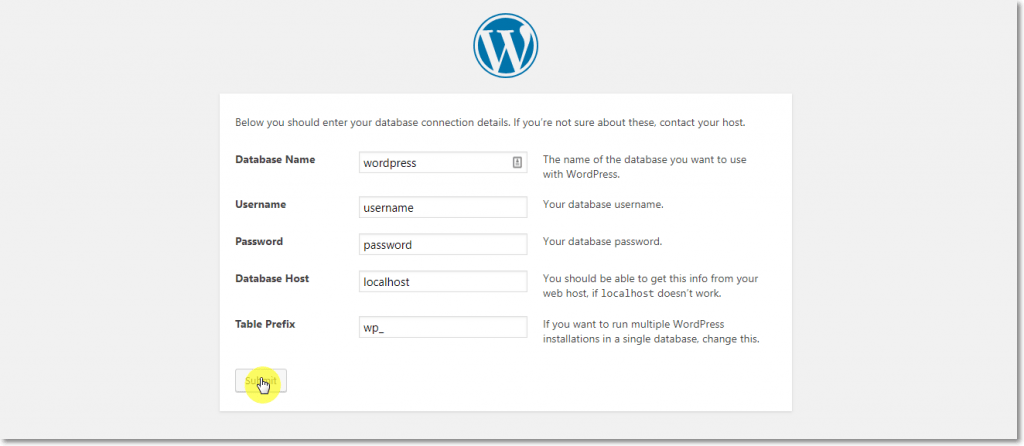
3. Provide your database information in the following tables. Database Host is by default ‘localhost‘.
If that doesn’t work, you can contact your hosting provider to get the right info. Table Prefix is by default “wp_” you can change it to anything you want.
Press the Submit button.
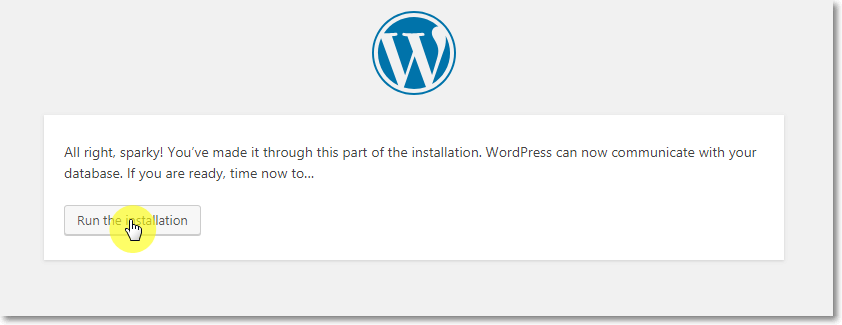
4. WordPress will now run your information and try to connect to your database. If your information is correct, you will see a confirmation screen.
Now click on the “Run the Install” button to continue.
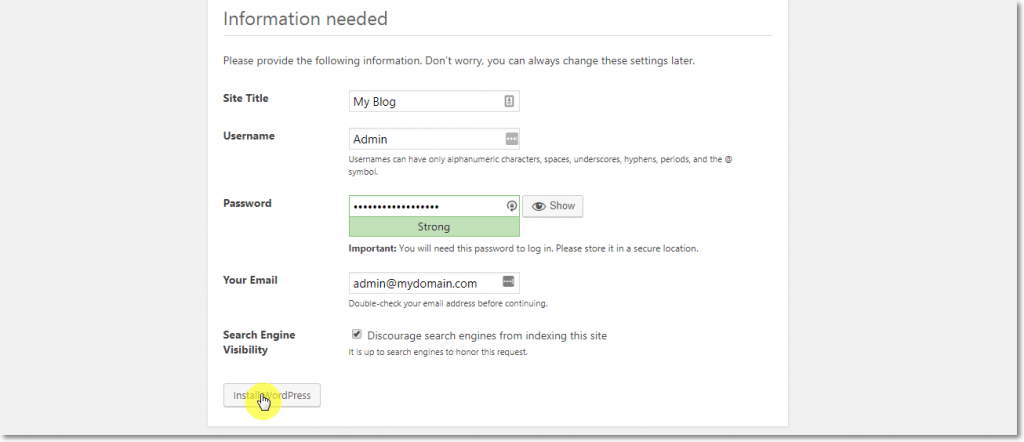
5. On this page, you need to provide your website/blog Title and Admin username, password, and email to create a user with an Administrative role.
If you want your site not to be indexed by search engines like Google, for now, you can mark the checkbox for the ‘Search Engine Visibility‘ option. You can change it later from settings when you are ready to go for the
Click on the “Install WordPress” button.
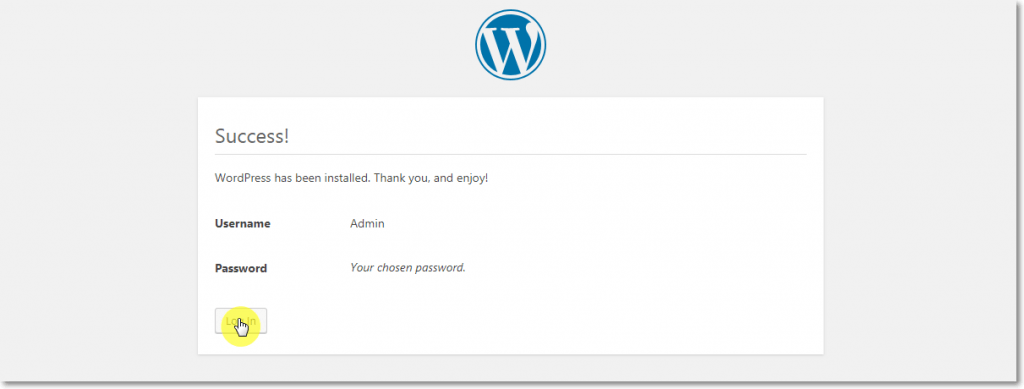
6. WordPress is now successfully installed for your website.
And that’s it!
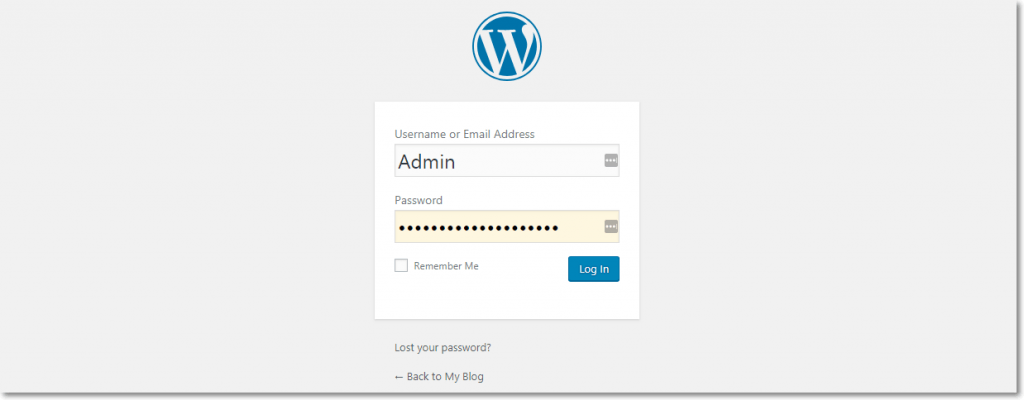
You just learned how to install WordPress manually using FTP or in cPanel. Now it’s time to log in to your admin area using the admin username and password.
You can start creating your first WordPress post.
Did we cover all the ways and steps properly for this tutorial on how to install WordPress manually?
Or we have missed anything?
Either way, let us know by leaving a comment below right now.




5 Comments
Thank you. This tutorial saved me! Clear information for someone who would not even call themselves a beginner yet! Much Appreciated
Thanks for your comment, Liam. Glad to know that it was helpful for you.
I am searching on google how to install WordPress in cpanel and I find your post. And after reading your content, hopefully, now we can install WordPress easily. Thank you!
Thanks a lot. It’s really nice to know that our content was helpful for you. Please let us know in the comment if you come up with any troubles. Don’t forget to share with your friends 🙂
WordPress not working on main website which is http://www.fooddoz.com instead wordpress works on demo website which is http://www.fooddoz.com/wp